Feeds:
Posts
Comments

Archive for May, 2010

This is my 50th posting, so I have decided to take this opportunity to start a series of “guest appearances” in my blog with my husband’s Prime Rib recipe.

A few weeks ago, my youngest brother Manolo surprised us with the news that he was engaged to be married.  My parents invited Janitza’s immediate family over for dinner to celebrate the occasion.  My mother asked Emilio and I to prepare an informal meal for their guests. Emilio immediately suggested that the main course be his version of prime rib because it can be made with very little effort and would give us a chance to spend some time with the guests instead of being sequestered in the kitchen.  All you need is an oven and a thermometer.  He feels very confident making this cut of meat since he has been preparing it for many years influenced first by his foodie friend Carlos as well as the guidelines in Dean and Deluca’s Cookbook, which I bought over 15 years ago.  This cookbook is amazing and one of our favorites!  It is 535 pages of recipes, history and cooking tips (but no pictures or illustrations).

Prime Rib gets its name because it is a “primal” cut, that is, one whole natural section of the steer.  In this whole section there are 7 ribs in total (Standing rib roast), but any smaller portion of this cut is still called a Prime Rib.  Emilio uses a digital thermometer to keep track of the meat’s doneness, but you may also use the quick read traditional ones.    Many times he uses a boneless cut. The meat of Prime Rib is very flavorful so all Emilio uses is coarse grain sea salt, pepper and fresh thyme to season it (he uses whole sprigs and then removes the sticks when done, but you can also use dried leaves). He even makes this dish on fishing trips since our boat has a small but potent oven.  The smell of this roast is succulent and inviting and fishermen from other boats gravitate towards ours for a taste.

According to the advice of Mr. Rosengarten, Mr. Dean, Mr. DeLuca AND Mr. Emilio ,  the best way to cook a prime rib is as follows:

1.  Bring prime ribs to room temperature (about 1 1/2 hours out of the refrigerator).

2.  Preheat oven at 275º F.  These guidelines are ideal for a medium to large 5-7 rib roast. Some recipes will favor a higher temperature, but cooking at lower temperature you will get evenness of color from outside to center when you cut it. You will get that desired savory, crunchy, brown crust.(smaller cuts need another set of rules)

3.  Remove some of the excess fat in the Prime Rib and place in rack of a roasting pan fatty side up (Emilio takes away excess fat and only leaves a fine lining of fat in the top). Place digital thermometer at this time.

this is the largest prime rib emilio has cooked. boneless

4.  Season Prime Rib with coarse sea salt (encrust it with your hands on the meat), fresh ground pepper and generously cover with fresh thyme leaves.

5. Instructions for quick read thermometers:

For a rare meat roast, calculate about 20 minutes per pound.  When you are about half an hour of your estimated finishing time, remove roasting pan from oven and insert a quick read thermometer into a fleshy part of the meat near the center (not near bone). Then follow to steps 6, 7 and 8.

6.  Instructions for digital thermometer:

For an extremely rare meat outcome, stop cooking once it has reached 115ºF.  For  rare meat, stop cooking at 120º and for medium-rare at 125º.

7.  Place roast in cutting board and let rest for about 15 minutes.  The roast will continue to cook outside oven going up 5-10 degrees.

8.  When ready to serve,  if your cut has bones, cut the meat away from bone in one huge chunk.  Then cut the filet of meat into approximately 1 inch slices to serve immediately.  Cut through the bones and serve them separately. Accompany with rice or your favorite style potatoes.

Note:  Cut into small pieces to eat and chew!!!! to prevent choking.

Read Full Post »

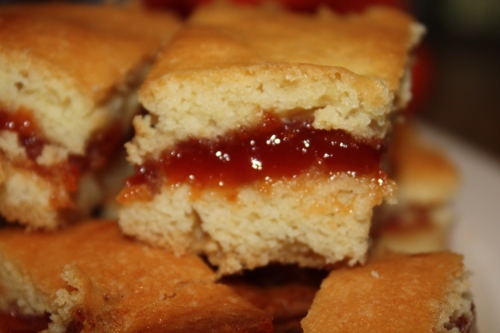
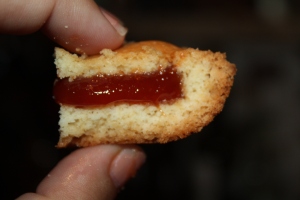
This torte is a traditional dessert in Puerto Rico and Cuba.   In Puerto Rico its called Panetela de Guayaba and in Cuba its called Masareal.  I have tried many homemade as well as commercial versions, but  I have found no comparison to this recipe. I believe the key is the melted butter.  Many recipes ask for softened butter and the turn-out is dryer and more like a cake.  This version melts in your mouth and is more chewey.

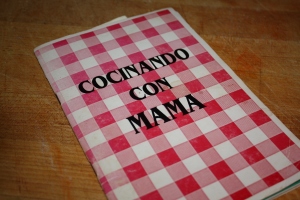
Our Senior year of high school (1991), our mothers prepared a booklet with a collection of recipes called “Cocinando con Mama” or Cooking with Mom, as a graduation present.  It was such a nice surprise to see that most mothers had shared their trademark recipes with us who were at that moment leaving the nest to pursue our college degrees.  This booklet was my companion during my first years in Washington, DC.  From this collection of recipes I make Jeannie’s Fruit Punch and Seven Layer Salad, Carmen Folgueira’s Rice with Onions, Dary’s Mexican Dip, and my mother’s Asopao among others.

A few years ago, we had a get together and my friend Cristina showed up with a basket full of Paneleta de Guayaba squares. They were delicious!  I am sure by now she can make this recipe with her eyes closed and I admit her “guayabitas” always taste better than the ones I make!  When I asked her for the recipe she said it was Bea’s mom (Michelle Rodriguez) recipe in “Cocinando con Mamá”.  So the next day I took out my booklet and got to work in the kitchen. The only variation from the original recipe is that I sift the flour once and add a little vanilla.  As a curious detail, some people like to eat only the corner pieces because they are crustier and others like to eat only the middle pieces which are softer.

It is easy to make and people love to get homemade Panetela de Guayaba as a present, only remember to whisk and beat by hand just until ingredients are fully incorporated.  Also, wet your hands continuously so that the dough doesn’t stick to your fingers.  If you happen to have left overs (rarely happens in my house) or want to make it ahead of time, store in air tight containers or tightly sealed plastic bags.

Enjoy!

Panetela de Guayaba (Guava Torte, Masareal)

Ingredients

2 eggs

1 cup of sugar

1/2 tsp pure vanilla extract

2 cups of self rising flour (sifted)

1 stick of butter (1/4 pound) melted

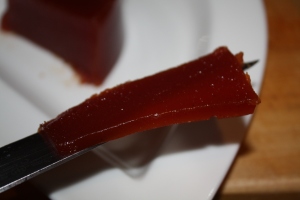
about 10 ounces of guava paste cut into 1/4 inch slices

about 2 tbsp of butter to grease mold

Procedure

1.  Preheat oven 350º F.

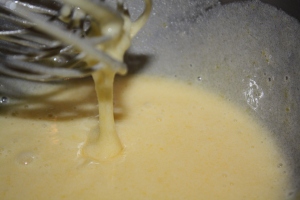
2.  Whisk eggs, vanilla and sugar by hand until creamy in texture.

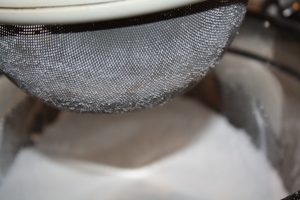
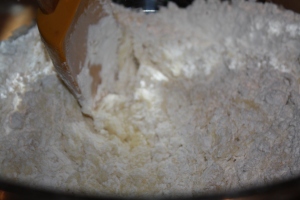
3.  Add sifted flour to egg/sugar mixture and stir with spatula.

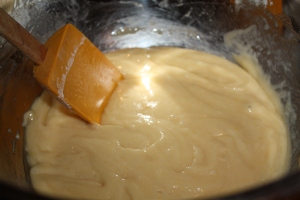
4.  Add melted butter and continue to mix by hand until ingredients are fully incorporated.  You will end up with a sticky dough.

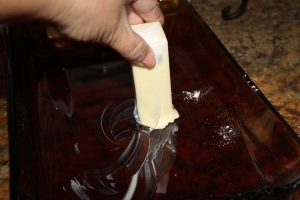
5.  Generously grease a baking mold (I use a glass Pyrex mold approximately 11×8 inches) with butter.

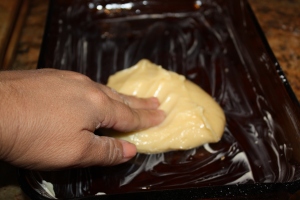
6.  Take a little over half the batter and spread in the bottom of baking mold.  It is very important that you continuously  wet your hands so that the dough does not stick to your fingers. I always place a glass of water in the countertop to dip my fingers and manage the dough.


7.  Place the guava paste strips evenly over the dough.

8.  Cover guava paste with remaining dough and bake for approximately 35 minutes or until toothpick comes out clean.

9.  Let cool and cut into squares.  Serve as a dessert or snack at parties.


Read Full Post »

Ah!  The traditional Northern Italian dish: Ossobuco; veal shank cooked in broth and wine and seasoned with vegetables and herbs. Mmmm!

Eleven years ago this week, one week shy of my first wedding anniversary, my husband Emilio attended a fishing tournament in the Dominican Republic, so I took off to a mother and daughter weekend getaway to the Spa at the Disney Institute in Orlando, Florida.   I believe this place is now open exclusively for corporate events, but at the time we attended, they had photography, animation, film, art and cooking workshops along with the typical massage, facial and exercise routine commonly found in spas.  Of course, foodies after all, we chose the 3 day cooking workshop which that weekend was devoted to Italian Cuisine.  We spent about 5 hours daily in the hands-on cooking classes and enjoyed olive oil and aged balsamic vinegar tastings.  The chefs were knowledgeable and the facilities superb. Each of us had our own cooking station, the ingredients were fresh and the assistants to the chefs always ready to lend a helping hand. From the basic fresh egg pasta to Ossobuco, we learned to make traditional italian dishes that I have used as guidelines to cook for my family and friends throughout the years.

Mom and I at the Disney Institute Spa and Italian Cooking Course May 1999

Ossobuco means “hollow bone” referring to the bone marrow of the veal shank used to make this dish.  Veal is the meat of young cattle (calves).  Its meat is tender, but the savory veal shank cut (lower part of the leg) can be a bit tough due to connective tissue and cartilage.  This kind of cut is best when braised (cooking method in which the meat is first seared or browned in fat in high heat and then cooked in broth and/or liquid in low heat).  When the veal shank is braised, the meat becomes very tender (you will not need a knife) and the bone marrow releases collagen which is then turned  into gelatin and along with the melted connective tissue helps in the thickening and flavor of the sauce.  The sauce also includes the “holy trinity” of italian cooking; onions, carrots and celery.

I only make Ossobuco when I have guests or for special occasions because it is a dish that takes a long time to make.  This is not something I would make during week days and I make sure I will not be rushed during the day I decide to make it.  After I cut and measure all ingredients, I start to sear the seasoned-flour coated veal shanks in a large roasting pan over my gas stove. Then I cover it with foil paper when ready to put in the oven.  If you make this recipe for 4 persons use a dutch oven or covered oven proof deep pan in which the shanks are close to each other and the liquid covers the meat at least half way up.  This modern version of Ossobuco Milanese goes well with mashed potatoes, polenta or Risotto Milanese.  I like to sprinkle it with Gremolata.  FYI, an older version of Ossobuco in Bianco (no tomatoes) is made with broth, cinnamon, allspice, laurel leaves, wine and Gremolata.

Buon Appetito!

Ossobuco

serves 4-5 persons

Ingredients

4 pounds veal shanks, about 4-5 pieces ( 1 1/2 inches thick and 5 inches wide each piece)

1/2 cup extra virgin olive oil

2 tsp salt

pepper to taste

2/3 cups all-purpose flour

1 cup of carrots

1 1/2 cups onions, finely chopped

1 celery stalk, chopped

5 garlic cloves, minced

1  cup of dry white wine

1 -14 1/2 ounce can diced tomatoes

1 1/2 cups of veal or beef stock

2 bay leaves

5 sprigs of fresh thyme

about 2 tbsp of coarsely chopped italian parsley (flat leaf)

1 tbsp freshly squeezed bitter orange- naranja agria (optional)

salt and pepper to taste

Gremolata

Procedure

1.  Preheat ovean 350º F.

2.  Mix flour, salt and pepper in a bowl.  Taste flour to ensure enough seasoning has been added.  Proceed to generously dredge the veal shanks coating them evenly.

3.  Heat extra virgin olive oil (medium) in stovetop just below smoke point.  I use my large roasting pan when I make it for a large group of people.  For this recipe, use a dutch oven, casserole or an oven proof sauté pan with lid where you can fit the veal shank close together and the liquids come at least  halfway up the sides of the meat.  Add the seasoned veal shanks to the hot oil to sear until golden brown on both sides (about 7 minutes each side).  Once veal is browned, remove the shanks to a clean plate.

4.  Immediately add onions, celery and carrots to the pan and sauté until onion is translucent and carrots golden brown.

5.  Add minced garlic and sauté briefly.

6.  Add white wine to deglaze pan. Scrape the bottom with a wooden spoon or spatula to remove all of the flavorful bits still clinging to the pan.

7.  Return veal shanks and its juices to the pan and reduce wine by 3/4.

8.  Add diced tomatoes, veal or beef stock and bring to a soft boil.

9.  Add orange juice and herbs.  Liquids should come at 3/4 up the veal shanks. Cover and place in the oven for 45 minutes. When timer goes off, check that enough stock remains to cover at least 1/2 of the veal shanks. Baste the meat with the juices which should be simmering gently. Reset time for 45 more minutes.

Braised Ossobuco

10.  Remove casserole/pan from oven and check for doneness.  Meat should fall readily from the bone. Taste the sauce and add more salt and pepper if necessary.  If sauce is too thin for your taste, remove meat form the pan to a serving dish or tray.  Place sauce in a small sauce pan and reduce to the desired consistency.  Transfer veal shanks to serving plates and top with the sauce.  You may also garnish with Gremolata, a mixture of lemon zest, garlic and italian parsley.

Read Full Post »

Gremolata is used in Italian cuisine as a garnish for Ossobuco alla Milanese. I also like to use it to garnish salads and my favorite; to season my Gremolata Capellini.  Believe me when I tell you the combination of tastes just burst in your mouth!

Last Sunday we celebrated Mother’s Day.  In honor of this occasion, we had a family gathering at my house.  The afternoon started sipping Champagne Rosé and snacking on crackers with bleu cheese and raspberry jam. For a late lunch/early dinner, my mother made her famous Shrimp with Vegetables in Pink Sauce as an appetizer and I made Ossobuco (recipe coming soon) with Gremolata and Risotto Milanese for our guests.  For dessert, I served Vanilla Flan as well as Strawberry-Cheese Flan my brother Manolo and his fiancé Janitza brought. We had a full house and a wonderful time! My brother Joaco helped in the stirring of the risotto which took a while because we made a huge batch for our group of almost 20 persons which included members from both sides of the family.

Of course, Mother’s Day is everyday, but let us embrace this holiday as a friendly reminder to be thankful and respectful of all the mothers and/or mother-like women in our lives who take care of the dirty little behind-the-scenes details that make our lives better each day. It is a day to honor and recognize their courage and sacrifice because we all know life is complicated and sometimes just not fair. So,  I am proud to say that last Sunday in my house, we had 3 generations of outstanding mothers from which I have learned the meaning of love, compassion, determination and respect. I am very grateful to count these blessings…  Thank you Mami!

Enjoy!

Gremolata

Ingredients

1 tbsp yellow lemon peel, grated

1 tsp chopped garlic

3 tbsp chopped italian parsley (flat leaf)

Procedure

1.  Grate lemon zest (be careful not to get any of the white pith of the lemon). Mix together in a bowl. Use to garnish Ossobuco, salads or or flavor pasta. You may refrigerate up to one week.

Read Full Post »

We inherited flans from many cultural influences.  Back in Roman times people would make savory flans from the surplus of eggs and other ingredients in their “pantry” (spices, spinach, honey, eel, etc.).  Centuries later in Spain and France, sweet flans started to flourish with caramel syrup as well as with other spices and nuts like almonds that the Moors (north africans, muslims and arabs) brought with them to the Iberian peninsula. Now flans are popular desserts in Latin American countries and are known worldwide.  I dare to say that some sort of flan is offered in the dessert menu of almost every restaurant in Puerto Rico!

Note:  The detachable baking dish used for making quiche is called a “flan tin” because in England open pastries filled with savory fillings are also called flans.

This recipe for simple Vanilla Flan is the basis for many variations. There is cheese flan, coconut flan, pumpkin flan, pear flan, guava flan, basil flan, strawberry flan and the list keeps going on and on like Bubba (inside joke for those of you who have seen the movie Forest Gump).  Anyway, it is a simple dessert to make and a crowd pleaser. Of course, flan is always made in bain-marie to successfully make the custard.  FYI, the bain-marie allows the flan to cook evenly in the center without creating a crust on the outside.  I use a 9 inch round metal mold with a hole in the middle, but you may also use an 8- 9 inch round crystal Pyrex or metal mold or double the recipe and make a large rectangular crystal mold.  Serve with mint, berries, ice cream, whipped cream or alone. Sometimes I over beat mixture and the vanilla flan has small holes inside, but it won’t alter the taste just the texture.  The flans I make that include mascarpone or cream cheese are always creamier (like cheesecake) and also delicious (will post recipes in the near future).

About 5 years ago, we rented a house in Casa de Campo, Dominican Republic for a summer vacation.  Our beautiful house had great accommodations, a beautiful view and a great cook.  One day Josefina made vanilla flan for our group and, you know me, always looking to learn new things in the kitchen, saw that she splashed dark rum and lemon zest in the vanilla flan mixture. That detail elevated the flan from good to outstanding giving it a lovely after taste!  She made it almost everyday after that.  We returned back to Puerto Rico rested, relaxed and with about 2-3 more pounds!

Here is my recipe for Vanilla Flan (Flan de Vainilla).  Enjoy!

Vanilla Flan (Flan de Vainilla)

Ingredients

1 1/2 cups granulated sugar

5 eggs

1 14 oz. can condensed milk

1 12 fl. oz can evaporated milk

1/2 cup fresh milk

1 tsp dark rum

1 tsp pure vanilla extract

dash of salt

Procedure

1.  Preheat oven 350º F.

2.  To make caramel put sugar in a sauce pan (I melt it directly in my metal mold in the stove top) and heat (med) until sugar starts to melt and turns light-medium brown in color. About 10 minutes stirring occasionally. Then pour into baking mold immediately making sure the bottom and sides of the mold are covered with some caramel.  Let rest for a few minutes to harden a bit.  Note:  make sure you are not distracted or have children running around in the kitchen while you are making caramel, it is very hot and can cause serious burns on the skin.


3. In a bowl, beat eggs with a whisk or electric mixer with whisk attachment.  Add milks, vanilla, salt and rum and beat until fully incorporated.  (DO NOT OVER BEAT SO THAT  YOU DON’T GET AIR BUBBLES INSIDE THE FLAN). Pass mixture through a strainer.  Add lemon zest and lightly mix with a fork or spoon into mixture.

4.  Pour mixture over caramel in baking mold.  Place mold in lower portion of broiler pan or roast pan and fill with hot water that comes almost half way up the sides of the baking pan to create a bain-marie or “baño de maría”.

5.  Bake for 45-50 minutes. Check for doneness by inserting a knife in the middle. It should come out clean.

6.  Let cool on your counter top a bit before you cover with foil paper and refrigerate for at least 4 hours or overnight.

7.  To serve, take out of refrigerator and let rest for about 15 minutes. With a knife or spatula carefully separate flan from sides of the pan (inside as well if using pan with a hole in the middle). You will notice caramel will come up the sides once it is separated and ready to turn over.

8.  Place serving dish on top of baking pan and turn over quickly.  Scrape remaining caramel with a spatula and pour over flan. Serve chilled.  (If you are going to put it in the refrigerator, cover so that it doesn’t become dry or hard).

Read Full Post »

My favorite desserts when I was a child were “Natillas”, Cheesecakes and Strawberries and Cream.  I guess taste buds are genetic because my son loves cheesecake and my daughter loves strawberries with whipped cream. Ja!  A few weekends ago my daughter became fixed on having strawberries with whipped cream as a snack, so we washed and halved fresh strawberries I had in the fridge and some heavy cream and sugar and made homemade whipped cream.  I rarely buy canned whipped cream and try to make it fresh whenever I need it.  Its so easy and absolutely delicious!

Enjoy!

Whipped Cream

Ingredients

1 cup heavy cream

1/4 cup granulated sugar

1 tsp amaretto liquor

Procedure


1.  Beat heavy cream until it becomes a bit thick. Add sugar and liquor. Continue to beat until soft peaks form.

2.  Serve over fruit, scones or dessert.  You may also place in a piping bag to decorate dessert.

Read Full Post »

Foodielady’s blog in nominated for best food blog at the bloggers choice awards 2010.  Whenever you have time, visit www.bloggerschoiceawards.com and cast your vote. I’m in the first five pages of the best food blog category. Thanks for your support!

Read Full Post »

A few months ago, we travelled to Orlando, Florida to attend a tradeshow related to my husband’s business.  My brother and sister in law who live in South Florida, Mandy and Frances, met us there.  One afternoon, Frances and I took a break from the show to go shopping in Orlando’s world famous outlet malls as well as browse at upscale shops.  One of our stops was at The Mall at Millenia where we got hungry, so we went to a California Pizza Kitchen Restaurant for lunch.  We shared a white bean hummus as appetizer topped with tomatoes and flat bread and a pizza with mozzarella, fontina and gorgonzola cheeses, thinly sliced pears, caramelized onions, hazelnuts and baby greens (something to try with my bbq homemade pizza recipe with a little white truffle oil of course!).  It was delicious! I had tried white bean hummus before at other restaurants like Cien Vinos in Guaynabo, Puerto Rico and often made traditional chickpea hummus at home.  This variation, is a great appetizer or light lunch. In the months following our trip, I started experimenting with recipes and quantities to make the white bean hummus at home and here is the outcome.  So far, I’ve had great reviews from family and friends!  I want to hear your comments and suggestions.

Enjoy!

Tips:  Before juicing the lemon, grate the lemon zest and use it to make Nieves’ Lemon Bread.  Also, sometimes the solids and oil in tahini (ground hulled sesame seeds) separate, so make sure they are fully incorporated to form a paste by mixing with a spoon before adding to the recipe.


Tuscan White Bean Hummus

Ingredients

white bean hummus

30 ounces canned Cannellini Beans or Alubias (drained)

1/4 cup tahini

6 cloves of garlic peeled (8 if you like it extra garlicky)

1 1/2 tsp kosher salt

1/2 tsp ground cumin

1/4 cup fresh lemon juice (1 yellow lemon approximately)

tomato topping

2 roma tomatoes cubed

1 tbsp fresh basil coarsely chopped

1/2 tsp kosher salt

1/4 cup extra virgin olive oil

pepper to taste

pita bread or pita chips

Procedure

1. Place all hummus ingredients in a food processor and pulse a few times to chop ingredients roughly. Then turn on for about 2 minutes until smooth paste is formed. You may add a bit of cold water if you want to reach a smoother consistency.

2.  Meanwhile, mix all the ingredients of the tomato topping in a bowl.

3.  To serve, spoon and spread white bean hummus in a serving plate and top with tomato mixture.  Serve with pita bread, flat bread or pita chips.

Read Full Post »

I’m back!!!! As you may have noticed, I like all kinds of rice.  When I started to make this recipe a long time ago for a Mother’s Day Celebration in my house, I chose to make it with parboiled rice because it is the best rice to use when cooking for a large group of people.  This rice dish is tasty, fragrant and easy.  It goes well with stir fry veggies, stews, braised or roasted beef, chicken or barbequed meats or seafood.  I also use it as my base rice for my “Arroz con Amarillos” recipe.

I want to know… how many of you know what parboiled rice is? All I knew was that when I cooked it, it took a bit longer to cook than white rice and that it was fool proof when cooking large amounts because it never became clingy or sticky. So I set out to find out what it really is and here are the facts according to http://www.rice-trade.com and wikipedia.

Parboiled rice is rice that has been partially boiled in its husk.  This procedure makes parboiled rice richer in nutritional value than processed white rice because the steaming seals most of the nutrients in (about 80% nutrients of brown rice).

Parboiled Rice is produced by a process of soaking, pressure steaming and drying prior to milling. Parboiling is a patented process. It changes the nutrients of the rice kernel. After undergoing this process and proper milling, the rice obtains a light yellow or amber color although the color largely fades after cooking. It cooks up fluffy and separate. It forms the main course of the meals for millions of people in Asia and else where. Many processed food such as popped or puffed rice products are produced from brown rice or parboiled rice for use as breakfast cereals and snack foods.

Process of Making Parboiled Rice

While in the paddy form, the rice is soaked and then steam cooked. This process does not allow the kernel to swell during the cooking and the moisture level does not exceed 40%. The starch granule is cooked (technically gelatinized), but not allowed to swell. The rice is then dried while still in the paddy form and then passed through a standard milling process to remove the hull and bran. This process has been going on for centuries in many countries and is believed to have started in ancient India.

Usage of Parboiled Rice

  • Parboiled rice has a higher vitamin content than raw milled rice.
  • Parboiled rice is quite nutritious, being an excellent source of niacin, a good source of thiamine and magnesium and a moderate source of protein, iron and zinc. Levels of vitamins and minerals fall between white rice and brown rice.
  • Parboiled rice is widely used in the catering industry as it is less sticky when cooked.
  • It is good in salads and retains its flavour and quality when kept hot for serving large numbers of people.
  • All rice comes from the field with insect eggs in the germ of the rice. These eggs hatch when the temperature is warm and moisture is available. The high temperatures occurring during parboiling kill any insect eggs in the rice and essentially sterilize it.
  • Parboiling also mends the cracks in the rice , that is, it glues broken rice back together and dramatically improves the milling yield of whole kernels in the rice.
  • Parboiling changes the texture of the rice. It becomes firmer and less sticky.
  • It is a much more durable kernel.
  • It takes just as long to cook (actually a little longer) as white rice, but is much easier to cook.
  • It can be overcooked without being mushy or losing its grain shape.
  • It is the only type of rice that can withstand the harsh treatment of most industrial processes that involve cooking and then freezing, canning, or drying.

Enjoy!

Arroz con Cilantro (Rice with Cilantro)

about 5-6 moderate sevings

Ingredients

1/4 cup canola or vegetable oil

1 small onion finely chopped

2 cups parboiled long grain rice

1 tsp kosher salt

1/4 cup of finely chopped cilantro

3 cups organic chicken broth

Procedure


1.  In a small-med caldero or heavy bottom saucepan, heat oil (medium) and sauté finely chopped onions until translucent.

2.  Add parboiled rice, cilantro and salt and sauté for about 1 minute.  Then add chicken broth (lower heat a a bit under medium to prevent rice from sticking to bottom of pan).  Allow liquids to dry up and then stir rice.

3.  Cover to finish cooking in low heat until rice is fully cooked.

Read Full Post »