Feeds:
Posts
Comments

Posts Tagged ‘Desserts’

Best Blueberry Pie is a crowd pleaser.  Once you try this recipe, oh boy!  you will get hooked.  It truly melts in your mouth and the taste is totally amazing and addictive.  The filling is adapted from a recipe that my friend Cristina’s mother in law, Marisita, gave me a few months ago.  I first tried it at Cristina’s last year birthday celebration where she brought her blueberry pie as a present. I had the privilege of getting a slice and it was absolutely delicious. Later on, Marisita was kind enough to send me her recipe, which I only changed by adding 1 more tbsp cornstarch and butter. Her recipe was inspired by a recipe she found in Marta Sgubin’s cookbook, Cooking for Madam-Recipes and Reminiscences from the home of Jacqueline Kennedy Onassis.

Marisita is a classy and fun mother of three and grandma to four, who has been very active in philanthropy throughout her life.  A few years ago she founded “Ciudadanos Pro-Defensa de la Belleza de Puerto Rico” (Citizens that protect the beauty of Puerto Rico), a non-profit organization which promotes education and taking action in keeping our resources clean and public spaces without litter.  Also, to create awareness of being proud of the beauty of our island and be responsible citizens by doing our part in keeping it that way.

Is it me, or can you also imagine a chorus of people saying “thank you for sharing Marisita” after they try this recipe, because it is truly the BEST BLUEBERRY PIE!

Enjoy!

Best Blueberry Pie

Ingredients

Sweet Pie Dough Recipe or store bought pie crusts

Filling

1 cup of sugar

4 tablespoons of cornstarch

1/2 tsp grated nutmeg

4 cups of fresh blueberries

1/4 stick (2 tbsp) butter, cut into small pieces (a bit more for greasing pie dish)

Procedure


1.  Make Sweet Pie Dough recipe and roll out half to line 9 inch greased pie dish (keep cold).

2.    Preheat oven at 375ºF (for about half hour before baking).  Mix together sugar, cornstarch and nutmeg.  Sprinkle over blueberries and toss until the dry ingredients are evenly distributed.  Spoon the filling into the pastry lined pan.  Dot with pieces of butter.

3.  Roll out remaining pastry to cover top of pie (cut with a round serving plate about 11 inches in diameter). Moisten edges with water to seal crusts together and shape rims. Make small hole in middle and slits around to vent. If you choose to use store bought pie crust, follow manufacturer instructions. Bake in lower third of rack (one under middle rack) over a rimmed baking sheet until deep golden for approximately 1 hour (check occasionally that the rims don’t burn). Let cool to room temperature and serve. Do not serve hot because it will be too runny.

Read Full Post »

This sweet pie dough recipe is the best I have found so far.  Relatively easy to make, consistent results and so good!!!!!!!  I have been reading Cook’s Illustrated magazine for many years. I find this magazine’s detailed recipes, tips and experiments full of valuable information as well as fun.  If you haven’t had the chance to experience this magazine I invite you to do so.  This is where America’s Test Kitchen, located just outside of Boston, “play” with recipes in a lab-kitchen and then publish the results (they also have a TV show hosted by Christopher Kimball).  Its findings are illustrated (either with pictures or drawings) and provides its readers with bits of history, chemistry, culture and valuable suggestions.  After many trials and errors, I bumped into this recipe while reading one of Cook’s Illustrated editions about 2 years ago, which I have only altered by adding a bit more sugar.  I mainly use it for Blueberry Pie, but can also be filled with your choice of ingredients.  Sometimes I have left overs from the trimmings of the pie discs and use it to make a small oven empanada filled with spinach and feta cheese, picadillo, stewed chicken, shrimps or sauteed mushrooms with onions and cheese, mixing sweet and savory in every bite. Also, can be used to cover a fruit cobbler.

The tricky thing with baking and doughs is the fact that you NEED to know a little about chemistry.  The effects baking powder will have when reacting with liquids or the gluten formed when flour is mixed with water, all have to do with scientific reactions.  Your ability to know when, how much, at what temperature  and in what way to incorporate ingredients will determine how successful you will be in your culinary endeavors.  That being said, with this pie dough recipe, Cooks Illustrated “kitchen scientists” tried making many pie recipes with varying results (148 to be exact!!!).  Some were too hard, others too flaky, others too sandy, others just too inconsistent.  For your information, gluten, long chains of protein that form when flour mixes with water, is what gives pie dough its structure. The more you knead and the more water you add, the more gluten forms and the result is a tough pie dough. The recipes I had seen before, mostly keep a ratio of about 5-6 tbsp of ice water to every 2 cups of flour to ensure flakiness, but with inconsistent results which depended on that days humidity among other factors (too dry, too hard, difficult to roll out, dough sticks or tears, etc.) In short, they discovered that vodka lets you add more liquid to the dough (making it easier to roll out) without toughening the crust.  The simple reason is because gluten doesn’t form in ethanol (vodka is 60% water 40% ethanol).  As a result, this recipe gets the benefits of  8 tbsp of water but actually has 6 1/2, which limits the formation of  gluten and guarantees tenderness.  The same reasons account for incorporating vegetable shortening in the recipe.  Butter has about 20% water content and starts melting at 50ºF, as opposed to vegetable shortening which has no water and melts at very high temperatures, so a combination of both butter and shortening provided a balance between flavor and tenderness.  In addition, flour is separated into two groups; the flour which will be covered with fat (which in turn will not absorb water), and the uncoated flour (which will absorb water and form gluten).  For a consistent flaky recipe, you need the same ratio of fat coated flour to uncoated flour to ensure that when the dough is rolled out, the gluten stretches into sheets that are separated by gaps of fat which will melt while being baked and result in crisp, flaky layers in the crust.  The best way to do this is in a food processor.

There are 3 steps to ensure a delicious, tender, flaky sweet pie dough.

1.  Blend part of the flour mixture with the fats (butter and vegetable shortening) to make sure there is a consistent amount of flour covered in fat in the final dough.  Fats should be cold.

2.  Add remaining flour and pulse to ensure consistent amount of uncoated flour in final dough.

3.  Sprinkle mixture with water and vodka and fold mixture until dough sticks together.

Note:  You can feed this sweet pie dough to children because the alcohol will impart no flavor and evaporate in the oven.


Sweet Pie Dough

Ingredients

2 1/2 cups unbleached all-purpose flour, plus extra for work surface

1 tsp salt

3 tbsp sugar

1 1/2 sticks (12 tbsp) cold unsalted butter, cut into 1/4 inch slices

1/2 cup of cold vegetable shortening cut into 4 pieces

1/4 cup of cold vodka

1/4 cup of cold water

Procedure


1.  In a food processor, mix 1 1/2 cups of flour, salt and sugar by pulsing two or three times.  Add butter and shortening and process until there is no uncoated flour and forms cottage-cheese-like curds (about 15-20 seconds).

2.  Scrape bowl with spatula and redistribute dough evenly around blade. Add remaining flour and pulse until dough is evenly distributed around bowl and mass has broken up (4-6 pulses).  Empty mixture into bowl.

3.  Sprinkle with vodka and water over mixture and quickly fold with rubber spatula by pressing down until dough is slightly tacky and sticks together.

4.  Divide dough into 2 balls and flatten into disks. Wrap into plastic paper and refrigerate at least 45 minutes or up to 2 days.

Read Full Post »

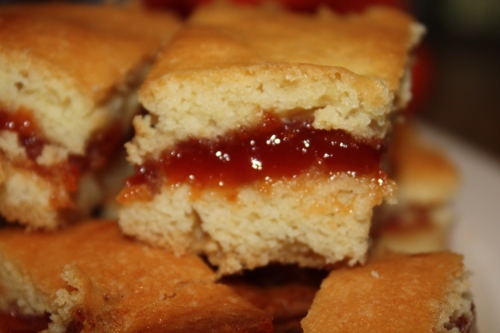
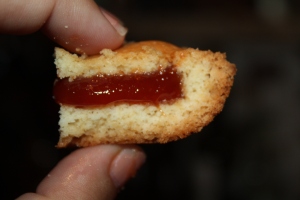
This torte is a traditional dessert in Puerto Rico and Cuba.   In Puerto Rico its called Panetela de Guayaba and in Cuba its called Masareal.  I have tried many homemade as well as commercial versions, but  I have found no comparison to this recipe. I believe the key is the melted butter.  Many recipes ask for softened butter and the turn-out is dryer and more like a cake.  This version melts in your mouth and is more chewey.

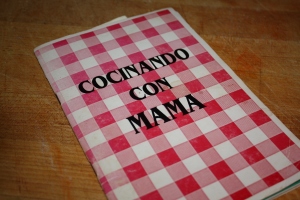
Our Senior year of high school (1991), our mothers prepared a booklet with a collection of recipes called “Cocinando con Mama” or Cooking with Mom, as a graduation present.  It was such a nice surprise to see that most mothers had shared their trademark recipes with us who were at that moment leaving the nest to pursue our college degrees.  This booklet was my companion during my first years in Washington, DC.  From this collection of recipes I make Jeannie’s Fruit Punch and Seven Layer Salad, Carmen Folgueira’s Rice with Onions, Dary’s Mexican Dip, and my mother’s Asopao among others.

A few years ago, we had a get together and my friend Cristina showed up with a basket full of Paneleta de Guayaba squares. They were delicious!  I am sure by now she can make this recipe with her eyes closed and I admit her “guayabitas” always taste better than the ones I make!  When I asked her for the recipe she said it was Bea’s mom (Michelle Rodriguez) recipe in “Cocinando con Mamá”.  So the next day I took out my booklet and got to work in the kitchen. The only variation from the original recipe is that I sift the flour once and add a little vanilla.  As a curious detail, some people like to eat only the corner pieces because they are crustier and others like to eat only the middle pieces which are softer.

It is easy to make and people love to get homemade Panetela de Guayaba as a present, only remember to whisk and beat by hand just until ingredients are fully incorporated.  Also, wet your hands continuously so that the dough doesn’t stick to your fingers.  If you happen to have left overs (rarely happens in my house) or want to make it ahead of time, store in air tight containers or tightly sealed plastic bags.

Enjoy!

Panetela de Guayaba (Guava Torte, Masareal)

Ingredients

2 eggs

1 cup of sugar

1/2 tsp pure vanilla extract

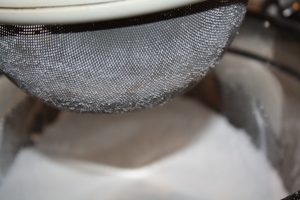
2 cups of self rising flour (sifted)

1 stick of butter (1/4 pound) melted

about 10 ounces of guava paste cut into 1/4 inch slices

about 2 tbsp of butter to grease mold

Procedure

1.  Preheat oven 350º F.

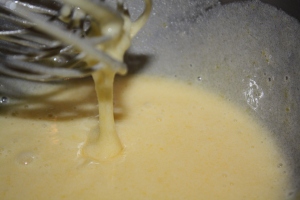
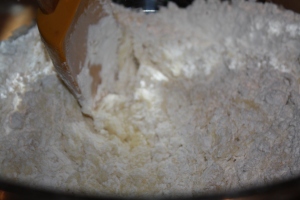
2.  Whisk eggs, vanilla and sugar by hand until creamy in texture.

3.  Add sifted flour to egg/sugar mixture and stir with spatula.

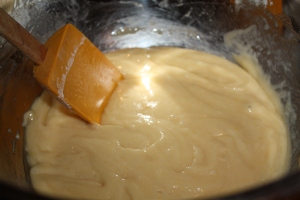
4.  Add melted butter and continue to mix by hand until ingredients are fully incorporated.  You will end up with a sticky dough.

5.  Generously grease a baking mold (I use a glass Pyrex mold approximately 11×8 inches) with butter.

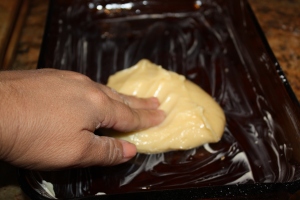
6.  Take a little over half the batter and spread in the bottom of baking mold.  It is very important that you continuously  wet your hands so that the dough does not stick to your fingers. I always place a glass of water in the countertop to dip my fingers and manage the dough.


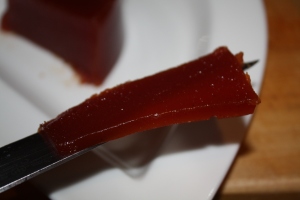
7.  Place the guava paste strips evenly over the dough.

8.  Cover guava paste with remaining dough and bake for approximately 35 minutes or until toothpick comes out clean.

9.  Let cool and cut into squares.  Serve as a dessert or snack at parties.


Read Full Post »
Pear Bliss

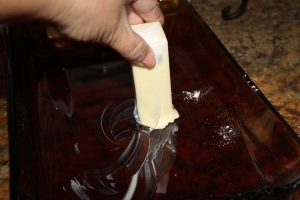
Sometimes I open the fridge and start improvising with the ingredients and/or leftovers I happen to find. I don’t like to throw away food so I am very creative with my everyday cooking.  I can humbly say most of the time the outcome of my experiments are pretty good.  I got the inspiration to make this dessert when one day about one year ago, I looked at a large fruit bowl I have in my kitchen and had about 8 ripe green bartlett pears. What had happened was that I bought a box of these pears at Costco on an impulse the week before without realizing my family and I wouldn’t be able to eat all of them before they spoiled.   So I started skimming through my collection of food magazines and books and found a pear pie in an edition of Everyday Food.  I read the recipe and made my own version with the ingredients I had at hand.  The outcome was this delicious pear custard pie. I called it Pear Bliss because it is so light and I couldn’t figure out how to describe it because it is neither a cake, custard, flan or pie by definition, texture or appearance. It is easy and fast to make.  For a more decadent version make it “a la mode” with a scoop of vanilla ice cream and caramel syrup on top.

Pear Bliss

Ingredients

1/4 cup butter (melted) plus some for pie dish

1/2 cup granulated sugar

1/3 cup unbleached all purpose flour

3 large eggs

2 tsp pure vanilla extract

3/4 cup evaporated milk

3 Bartlett, Comice or D’Anjou pears (quartered and cored)

confectioners sugar for dusting

Procedure


1.  Pre-heat oven at 350º f.  Butter 9 inch pie dish (I use a glass Pyrex round 9” pie dish)

2.  In a blender, process melted butter, granulated sugar, flour, vanilla extract, eggs and evaporated milk until completely blended.

3.  Slice pears about 1/4 inch thick lengthwise.

4.  Arrange sliced pears in greased pie dish in a circular pattern.  Once finished arranging the pear slices, press down with the palm of your hand to level.

5.  Pour batter over pears and place in oven for 50 minutes.

6.  Let cool and sprinkle with powdered sugar.

Enjoy!

Read Full Post »