Feeds:
Posts
Comments

Posts Tagged ‘baking’

There are so many different recipes for brownies out there that it is a bit overwhelming to look for one in the internet. Everyone claims to have the ultimate brownie recipe. Most people I know are very particular about their standards of what a great brownie should taste like. Some like crumbly, others fudgy, others chewey, others cakey, with nuts, with chocolate chips, with frosting, etc. and the possibilities are endless. Some keep their recipes zealously locked in a “bank safe” so that the “state secret” is not shared with anyone. In conclusion, people are very passionate about brownies! For many years, I have tried hundreds of recipes from books, magazines, friends, tv shows, internet, original experiments I make and I truly think this is one of the best. This recipe is adapted from a recipe in marthastewart.com (chocolate chunk brownies). The original recipe calls for more butter and gives you a choice of various chocolate chunks, but I am a sucker for white chocolate. I admit I haven’t made a boxed brownie mix in probably 10 years. I like to melt the chocolate and the butter and mix with the sugar, eggs and vanilla and finally incorporate the flour. It takes me approximately the same amount of time as with the boxed counterpart. It is pretty easy and fun process which my children love! I always, always, have unsweetened chocolate in my pantry in case I crave homemade brownies on a Sunday afternoon, Je! So I want to share the universal love of brownies with you by posting my version of this delicious recipe.

Enjoy!

Double Chocolate Brownies

Ingredients

2 cups unbleached all-purpose flour

1 1/4 tsp baking powder

1 1/4 tsp salt

2 1/2 sticks (1/2 pound plus 4 tbsp) unsalted butter cut into small pieces (more for greasing pan)

7 ounces unsweetened chocolate coarsely chopped or previously melted unsweetened chocolate pouches

2 3/4 cups of granulated sugar

4 large eggs

2 tsp pure vanilla extract

1 cup white chocolate chips (small drops)

Procedure


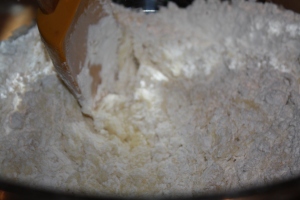
1. Preheat oven 350ºF. Line a 12×17 inch jelly roll pan with parchment paper and grease with butter or cooking spray, including sides. In a bowl, whisk together flour, baking powder and salt. Set aside.

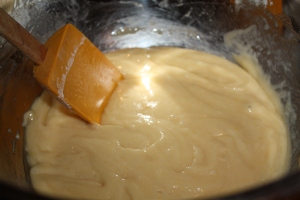
2. Melt butter and chocolate in bain-marie or double boiler and remove from heat as soon as they have melted and formed a smooth mixture. Set aside and let cool a little. Then transfer to a bowl and beat with the sugar with the whisk attachment of an electric mixer for about 3 minutes in medium speed. Stop, add vanilla and mix for 1 minute. Continue mixing at medium speed and add eggs, one at a time. Stop, scrape bottom with spatula. Bring speed to low and add flour mixture in small batches just until almost fully incorporated with chocolate mixture (do not over beat!!!!).

3. Fold in white chocolate chips. Pour batter into jelly roll pan and spread evenly with spatula. Bake at 350ºF for 20 minutes until brownies have just set. Take out of oven and let cool completely before cutting. I cut with metal spatula instead of with knife. I find it makes a nicer and cleaner cut.

Read Full Post »

Best Blueberry Pie is a crowd pleaser.  Once you try this recipe, oh boy!  you will get hooked.  It truly melts in your mouth and the taste is totally amazing and addictive.  The filling is adapted from a recipe that my friend Cristina’s mother in law, Marisita, gave me a few months ago.  I first tried it at Cristina’s last year birthday celebration where she brought her blueberry pie as a present. I had the privilege of getting a slice and it was absolutely delicious. Later on, Marisita was kind enough to send me her recipe, which I only changed by adding 1 more tbsp cornstarch and butter. Her recipe was inspired by a recipe she found in Marta Sgubin’s cookbook, Cooking for Madam-Recipes and Reminiscences from the home of Jacqueline Kennedy Onassis.

Marisita is a classy and fun mother of three and grandma to four, who has been very active in philanthropy throughout her life.  A few years ago she founded “Ciudadanos Pro-Defensa de la Belleza de Puerto Rico” (Citizens that protect the beauty of Puerto Rico), a non-profit organization which promotes education and taking action in keeping our resources clean and public spaces without litter.  Also, to create awareness of being proud of the beauty of our island and be responsible citizens by doing our part in keeping it that way.

Is it me, or can you also imagine a chorus of people saying “thank you for sharing Marisita” after they try this recipe, because it is truly the BEST BLUEBERRY PIE!

Enjoy!

Best Blueberry Pie

Ingredients

Sweet Pie Dough Recipe or store bought pie crusts

Filling

1 cup of sugar

4 tablespoons of cornstarch

1/2 tsp grated nutmeg

4 cups of fresh blueberries

1/4 stick (2 tbsp) butter, cut into small pieces (a bit more for greasing pie dish)

Procedure


1.  Make Sweet Pie Dough recipe and roll out half to line 9 inch greased pie dish (keep cold).

2.    Preheat oven at 375ºF (for about half hour before baking).  Mix together sugar, cornstarch and nutmeg.  Sprinkle over blueberries and toss until the dry ingredients are evenly distributed.  Spoon the filling into the pastry lined pan.  Dot with pieces of butter.

3.  Roll out remaining pastry to cover top of pie (cut with a round serving plate about 11 inches in diameter). Moisten edges with water to seal crusts together and shape rims. Make small hole in middle and slits around to vent. If you choose to use store bought pie crust, follow manufacturer instructions. Bake in lower third of rack (one under middle rack) over a rimmed baking sheet until deep golden for approximately 1 hour (check occasionally that the rims don’t burn). Let cool to room temperature and serve. Do not serve hot because it will be too runny.

Read Full Post »

As I have mentioned before, lasagnas are great alternatives for boat and fishing trips.  Last week, it was Club Nautico de San Juan‘s International Billfish Tournament, the longest consecutive fishing tournament in the world (57 years).  Anglers from all over the world come to Puerto Rico to this tag-and-release tournament and its a week full of action, fun and camaraderie. My husband Emilio has been involved in this tournament for over 20 years and is currently a board member.  Actually, I met him during the week of a tournament in August 1997 and we were married by June 1998.  So, I have been a “fishing widow” ever since…Ja!, although I join him fishing once in I while, like I did for Club Deportivo de Mayaguez’s Blue Marlin Tournament in the western part of the island, where I witnessed the most beautiful sunsets in my life and placed 1st in the women’s division and 3rd overall (among 500 fishermen, not bad!!)

This is me fishing at Club Deportivo de Mayaguez Blue Marlin Tournament October 2009

The week of the tournament is filled with fun events like the flag ceremony, excursions for the wives of the anglers, fashion shows, the Billfish Foundation’s Auction and of course the themed party.  This year the theme was Disco Night and I must tell you it has been the best party at the tournament yet!  Some members of the board along with other volunteers did a choreography to Dancing Queen and Fever Night mix which turned out to be spectacular and got everyone in dancing mode! There were also Donna Summer and Boy George impersonators.

The Marlin Dancers (I am the 6th one from the left)

Fishing goes on for 4 days with a rest day in between.  Emilio was assigned to bring lunch for two of the four days of fishing, so for one day I sent my Meat Lasagna with green salad and Amarillos en Almíbar (sweet plantains sauted in butter, brown sugar and cinnamon).  The boys (Frankie, Joe, Emilio and Ricky) loved it and left nothing on the plate!  To comply to their requests, I am posting this recipe today.  Here is my version of Meat Lasagna.

Enjoy!

Meat Lasagna

Ingredients

Picadillo Recipe

Basic Tomato Sauce Recipe (yields 3 cups)

8 ounces ricotta cheese or mascarpone

about 15 pieces of lasagna strips

12 fresh basil leaves coarsely chopped

4 cups of shredded mozzarella

Procedure


top layer has tomato sauce, cheese and basil only


1.  In a 13×9 baking dish, place one layer of lasagna strips. (I use the oven ready strips which do not need to be boiled but you may also use the traditional boiled ones.)  Spread 4 ounces of cheese, half of the picadillo-ground beef recipe (remove excess fat and liquid), 1 cup of basic tomato sauce and 1 cup of shredded mozzarella.  Cover again with lasagna strips and repeat procedure.  Place third layer of lasagna strips and cover with remaining cup of tomato sauce, chopped fresh basil and remaining mozzarella. Cover with aluminum foil and bake for 35 minutes at 390ºF. Uncover and broil until cheese on top is golden (about 7-10 minutes).  Serve with garlic bread, amarillos en almíbar, white rice or salad.

Read Full Post »

This sweet pie dough recipe is the best I have found so far.  Relatively easy to make, consistent results and so good!!!!!!!  I have been reading Cook’s Illustrated magazine for many years. I find this magazine’s detailed recipes, tips and experiments full of valuable information as well as fun.  If you haven’t had the chance to experience this magazine I invite you to do so.  This is where America’s Test Kitchen, located just outside of Boston, “play” with recipes in a lab-kitchen and then publish the results (they also have a TV show hosted by Christopher Kimball).  Its findings are illustrated (either with pictures or drawings) and provides its readers with bits of history, chemistry, culture and valuable suggestions.  After many trials and errors, I bumped into this recipe while reading one of Cook’s Illustrated editions about 2 years ago, which I have only altered by adding a bit more sugar.  I mainly use it for Blueberry Pie, but can also be filled with your choice of ingredients.  Sometimes I have left overs from the trimmings of the pie discs and use it to make a small oven empanada filled with spinach and feta cheese, picadillo, stewed chicken, shrimps or sauteed mushrooms with onions and cheese, mixing sweet and savory in every bite. Also, can be used to cover a fruit cobbler.

The tricky thing with baking and doughs is the fact that you NEED to know a little about chemistry.  The effects baking powder will have when reacting with liquids or the gluten formed when flour is mixed with water, all have to do with scientific reactions.  Your ability to know when, how much, at what temperature  and in what way to incorporate ingredients will determine how successful you will be in your culinary endeavors.  That being said, with this pie dough recipe, Cooks Illustrated “kitchen scientists” tried making many pie recipes with varying results (148 to be exact!!!).  Some were too hard, others too flaky, others too sandy, others just too inconsistent.  For your information, gluten, long chains of protein that form when flour mixes with water, is what gives pie dough its structure. The more you knead and the more water you add, the more gluten forms and the result is a tough pie dough. The recipes I had seen before, mostly keep a ratio of about 5-6 tbsp of ice water to every 2 cups of flour to ensure flakiness, but with inconsistent results which depended on that days humidity among other factors (too dry, too hard, difficult to roll out, dough sticks or tears, etc.) In short, they discovered that vodka lets you add more liquid to the dough (making it easier to roll out) without toughening the crust.  The simple reason is because gluten doesn’t form in ethanol (vodka is 60% water 40% ethanol).  As a result, this recipe gets the benefits of  8 tbsp of water but actually has 6 1/2, which limits the formation of  gluten and guarantees tenderness.  The same reasons account for incorporating vegetable shortening in the recipe.  Butter has about 20% water content and starts melting at 50ºF, as opposed to vegetable shortening which has no water and melts at very high temperatures, so a combination of both butter and shortening provided a balance between flavor and tenderness.  In addition, flour is separated into two groups; the flour which will be covered with fat (which in turn will not absorb water), and the uncoated flour (which will absorb water and form gluten).  For a consistent flaky recipe, you need the same ratio of fat coated flour to uncoated flour to ensure that when the dough is rolled out, the gluten stretches into sheets that are separated by gaps of fat which will melt while being baked and result in crisp, flaky layers in the crust.  The best way to do this is in a food processor.

There are 3 steps to ensure a delicious, tender, flaky sweet pie dough.

1.  Blend part of the flour mixture with the fats (butter and vegetable shortening) to make sure there is a consistent amount of flour covered in fat in the final dough.  Fats should be cold.

2.  Add remaining flour and pulse to ensure consistent amount of uncoated flour in final dough.

3.  Sprinkle mixture with water and vodka and fold mixture until dough sticks together.

Note:  You can feed this sweet pie dough to children because the alcohol will impart no flavor and evaporate in the oven.


Sweet Pie Dough

Ingredients

2 1/2 cups unbleached all-purpose flour, plus extra for work surface

1 tsp salt

3 tbsp sugar

1 1/2 sticks (12 tbsp) cold unsalted butter, cut into 1/4 inch slices

1/2 cup of cold vegetable shortening cut into 4 pieces

1/4 cup of cold vodka

1/4 cup of cold water

Procedure


1.  In a food processor, mix 1 1/2 cups of flour, salt and sugar by pulsing two or three times.  Add butter and shortening and process until there is no uncoated flour and forms cottage-cheese-like curds (about 15-20 seconds).

2.  Scrape bowl with spatula and redistribute dough evenly around blade. Add remaining flour and pulse until dough is evenly distributed around bowl and mass has broken up (4-6 pulses).  Empty mixture into bowl.

3.  Sprinkle with vodka and water over mixture and quickly fold with rubber spatula by pressing down until dough is slightly tacky and sticks together.

4.  Divide dough into 2 balls and flatten into disks. Wrap into plastic paper and refrigerate at least 45 minutes or up to 2 days.

Read Full Post »

Lemon Meringue Pie should be creamy and tart, instead of gelatinous and too sweet, at least according to my tastes. Ja!  I have been making this recipe for 20 years now! WOW, I can’t believe I said 20 years.  It is inspired in a recipe from Gourmet Magazine April 1990.  The original recipe calls for key limes, but the taste was too strong for some people (I like it!).  So I have made some changes over the years to find the perfect balance between sweet and sour.  Large yellow lemons work great for this recipe.  This pie is also pretty easy to make.  I  like the fact that the crust is crumbly instead of like cardboard.  Serve with a little raspberry coulis on the side if you can make it.  I also make mini lemon meringue pies in a lined mini muffin pan (always a hit!). Place filling and meringue in piping bags to better handle the smaller portions.  Also, you can use the filling to make mini lemon tartlets (use store bought tartlets). You can make the night before and store in the refrigerator. Here goes the recipe for one of my favorite desserts!

Enjoy!

Click here to print recipe

Lemon Meringue Pie

Ingredients

Crust

1 1/4 cup zweiback or graham crackers crumbs (about 9 honey graham crackers, 5 oz.)

2/3 cup almonds (ground fine in a food processor)

1/2 stick (1/4 cup) unsalted butter, melted and cooled

1/3 cup sugar

Filling

3 egg yolks

14 ounce can of sweetened condensed milk

1/2 cup fresh lemon juice (about 3 lemons )

zest of 1 lemon (about 1/2 tablespoon)

Meringue

3 egg whites (at room temperature)

pinch of salt

1/3 cup of sugar plus 2 tbsp

Procedure


1.  Put crackers and almonds in a food processor and finely ground them.

2.  Transfer to a bowl and combine with sugar and cooled melted butter by folding with a spatula.  It will resemble wet sand.

3.  Press mixture into the bottom and sides of pie dish (9-10 inches).  Bake the shell in middle rack of pre-heated oven at 350ºF for 10 minutes or until browned lightly. Let the shell cool on rack.

4.  Meanwhile, in a large bowl beat yolks with condensed milk (I use an electric mixer in med-hi for about 2 minutes).  Stir in the lemon juice a little at a time to combine filling well.

5. Spoon the filling into the shell, spreading evenly, and chill in the refrigerator for about 1 hour.

6.  When 15 minutes are left in the fridge, pre-heat again oven at 350ºF. Beat egg whites with pinch of salt until they hold soft peaks.  Add the sugar, beating, a tablespoon at a time until it holds stiff peaks.  Spread the meringue over the filling and bake the pie in the middle of rack for 15 minutes, or until it is just golden.  Chill pie for at least 2 hours and serve.

Read Full Post »

In a few weeks I will be attending a family reunion of the Arbona side of the family. My great-grandfather came to Puerto Rico from Mallorca, in the Balearic Islands (Spain) in the late 1800’s.  In short, he went back, got married, had his children and they returned to Puerto Rico due to the Spanish Civil War during the 1930’s.  We are a large group! (one of my great-uncles had 10 children, they all had children and their children have children, etc.).  In honor of this gathering,  I got inspired to publish my recipe for Ensaimada Mallorquina.

To give you a little background, Ensaimada is a typical sweet bread from the island of Mallorca .  They are usually large (about 12 inches in diameter) and sometimes filled with fruit preserves, “angel hair” (pumpkin confit), sobreasada, almond puree, cream or apricots.  For hundreds of years, like many countries in South America, Puerto Rico had a large group of immigrants that came from different parts of Spain (including the beautiful island of Mallorca) looking for work, fortune and a better quality of life. My grandfather, Papi Bartolo was one of them. Therefore, Puertorican culture is highly influenced by the traditions of many different regions of Spain.

In Puerto Rico there is a version of Ensaimada called “mallorca”, like the island of its origin. It is usually the size the palm of my hand, so no wonder as a little girl, I was in awe of the size of Ensaimadas on my visits to Mallorca.  Also, they can be found in every bakery shop in Puerto Rico and even American fast food restaurants have incorporated it in their breakfast menus to adapt to the tastes of the locals. However, although they have a similar shape, they are not rolled up twice like traditional ensaimadas and its dough is more similar in texture to “brioche” (flaky french bread) or challah bread, depending on the place where you buy them.  The most popular mallorcas in Puerto Rico are the ones from La Bombonera in Old San Juan (to me the closest texture to ensaimada in PR) and from Panaderia Pepin (absolutely delicious, but not similar in texture) in Guaynabo and San Juan.

The name ensaimada comes from the arabic word “saim”, which means pork lard.  The first accounts of ensaimadas are from 17th century writings.  There were not written recipes to make ensaimadas. However, there was a method.  According to Mallorcan Web,  ” to explain how ensaimadas were made 200 years ago and nowadays is one and the same thing. The process is completely artisan and can take up to 24 hours to complete. To make the dough old measures are still used: almudes and ounces. To get some idea, in Mallorca an almud of dough contains a kilo of sugar, a dozen eggs, a liter of water and all the ‘strong’ flour it can take (thereby is the secret, no measurement for the flour!). To these ingredients yeast is added which can be either natural yeast or in powder form, and the kneading starts. In former times this was done by hand. Although nowadays machines are used, to do so by hand the dough is placed in a bowl and kneaded until it is soft. After more or less half an hour, it is smooth.” This dough is kneaded and rolled very thinly, then rolled and spiraled to form the traditional shape of an ensaimada which is like the house of a snail.  Lately, I’ve been told that for some reason the ensaimadas that are sold in large boxes at the airport of Palma de Mallorca are not allowed to fly with you on the plane, you have to put it in your suit case and send it through cargo.

Ensaimadas can be served warm or at room temperature for breakfast, as dessert, with coffee or tea or as a snack. They are a bit crusty on the outside and flaky on the inside. Also, you may heat ensaimada that is a few days old in the griddle with butter or ham and cheese like a panini. I had never found a recipe that I felt confident I could follow, but over a year ago I found this recipe in a german website (germans flock to the island of Mallorca in large groups throughout the year) and adapted it.  It is fairly easy to make, just takes time because of the wait to let dough rise.  Remember the oven must be very hot and to use common sense since ovens vary.  I like to let them rise overnight and bake them on a weekend morning for my family to enjoy. Here is my version of Ensaimada de Mallorca.

Enjoy!

Ensaimada de Mallorca

Recipe adapted by:  Aleida L. Arbona from www.deliciousdays.com who adapted it from www.kuechengoetter.de

Ingredients

5 cups bread flour or unbleached all purpose flour

1/3 cup granulated sugar

1/2 tsp fine sea salt

1 packet dry yeast(2 1/4 tsp) (1 cube fresh yeast)

1 cup warm milk (add a little over one cup)

2 eggs

approx. 2/3 cup pork lard or vegetable shortening

powdered sugar for dusting

Procedure

1.  Mix flour, sugar and salt in a large bowl.  Make well in the center and add 1 packet of dry yeast (2 1/4 tsp) or 1- 40 gram block of fresh yeast (crumbled) , a large pinch of sugar and enough warm milk until the yeast is covered.  Stir the yeast and milk a bit with a fork.  Cover the bowl with a kitchen towel and let rest for about 15 minutes or until the yeast has bubbles.

2.  Add other ingredients and knead by hand or with your dough hook in your electric stand-up mixing machine.   If the dough is too sticky add a bit more flour.  Cover the bowl again  and let rest in a warm place for at least 30 minutes or until dough has doubled.

3.  Punch it down softly, and place the dough on a well floured surface.  Cut into 10 equal portions and form into neat balls before letting them rest.  Sprinkle with flour and cover with kitchen towel  for at least 30 minutes.

4.  To shape the ensaimadas, flatten dough ball and roll out with a rolling pin (use flour as needed) until you get a thin disc. Brush it generously with lard or vegetable shortening.  Roll up cautiously and set aside on lined baking sheets (either with parchment paper or silicone mats).

5.  Coil up each piece of dough until it resembles the house of a snail tucking the outer end under (some people pull the rolled up dough a bit to make it longer and thiner, but that’s optional). Do so loosely because the spaces will fill up as the dough keeps rising.  Place 5 ensaimadas in a baking sheet, leaving space between them. Lightly brush with lard or shortening and cover up again.  This is the final rise which is done from 4 hours to overnight (you choose, I do it overnight).

6.  To bake, preheat oven 390ºf and bake for 12-15 minutes or until golden (do not let brown too much).  Let cook in a wire rack for a few minutes.

7.  Generously dust with powdered sugar

Read Full Post »

A pound cake is a kind of cake which is made of 1 pound of each of the following ingredients: eggs, flour, butter and sugar.  However, there are many variations, substitutions and additions to this type of cake and the quantities are often varied to fit the baking mold you are going to use.  For example, sometimes vegetable oil or sour cream is used to substitute some of the butter for a less dense and more moist cake.  Also, baking soda and/or baking powder are sometimes added to induce leavening properties while baking. In addition, vanilla extract (or other flavoring agents), dried fruit and/or nuts can be incorporated and still be called pound cake as long as an approximate ratio of 1:1:1:1 of the ingredients is maintained.

I have always been a big fan of blueberries. Blueberry muffins, bagles, pancakes, preserves, pie and pound cake, have been in my list of favorites since I was young.  While I lived in DC, I loved the blueberry muffins at Armand’s for breakfast or going to Sutton Place Gourmet and buying their delicious Blueberry Pound Cake to reward myself after a long week of exams.  I  have never found a Blueberry Pound Cake as good as the one they had at Sutton Place Gourmet except for this one.  This version of Blueberry Pound Cake has taken me a while to perfect.  Sometimes it would come out too dense or too light or too dry or I put too many blueberries and it would break apart.  To tell you the truth, I tried dozens of recipes before I came up with this version. As a result, I have kept an approximate ratio of about 1/2 pound of the main four ingredients in this recipe (give or take a little).  Remember, never use canned blueberries only fresh for the best results. Serve for breakfast, snack or for dessert with a scoop of vanilla ice cream.  Here is my version of Blueberry Pound Cake.

Enjoy!

Blueberry Pound Cake

Ingredients

1/4 pound unsalted butter (1 stick) plus a little more for greasing pan

1 1/2 cups of granulated sugar

1 tsp pure vanilla extract

3/4 cups sour cream

3 eggs

2 cups of unbleached all purpose flour (sifted) plus 1 tbsp to sprinkle over blueberries

1 tsp baking powder

1/2 tsp baking soda

pinch salt

lemon zest 1 lemon

3/4 cup of fresh blueberries

glaze

superfine sugar (10×10)

juice of 1 lemon

Procedure


1.  Cream butter and sugar with paddle attachment of stand up electric mixer. (You may use an electric hand mixer as well).

2.  Add sour cream and vanilla extract followed by eggs, one at a time.

3.  Meanwhile in a bowl, sift the flour.  Add salt, baking powder and baking soda and gently stir with a fork to combine.

4.  Add flour mixture to wet ingredients in batches just until fully incorporated.  The result will be a dense batter.

5.  Add lemon zest to finish blending.

6.  In a small bowl place washed fresh blueberries and dredge with some flour to coat. Gently fold into mixture.

7.  Coat loaf pan with butter and pour batter into pan (10×5 inches).  Bake at 350ºF for 1 hour or until sharp knife comes out clean. Let rest for about 10 minutes.

8.  Remove from pan carefully and allow to cool for about 30 minutes.  Meanwhile mix the juice of the lemon used for the lemon zest with powdered sugar until desired consistency has been reached.  Drizzle with a spoon over pound cake.  Store in a cake dome, foil paper or container with lid.

Read Full Post »

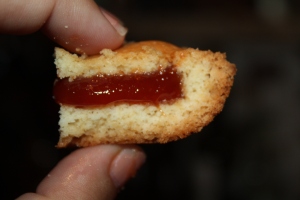
As a young girl my grandmother Ita would make Mantecaditos for me every time she came to visit from Ponce, the southern part of the island.  I learned to make her recipe, a variation of  Carmen Aboy Valdejully’s cookbook Cocina Criolla.  Ita would alter the recipe and substitute vanilla for the almond extract and place guava paste pieces on top of the Mantecaditos instead of maraschino cherries.

This is a recipe that everyone in Puerto Rico should have.  Mantecaditos are a constant at birthday parties and served as a snack or to accompany coffee or tea. They are the equivalent of the Italian Wedding Cookies, shortbread,  thumbprints cookies and polvorones in other parts of the world.  It took me a while to come up with this recipe, but now I have perfected it and people love my Mantecaditos.  I make them for school activities, gifts, birthday parties and my family is crazy about them.  It is easy to make and my children help me in the process. You may also divide the dough and add a little food coloring if you want to make them in different colors.

Enjoy!

Mantecaditos

Ingredients

makes 40 units

1/3 cup almonds (grounded in food processor)

1/2 cup (8 tbsp)  vegetable shortening (cold)

1/4 pound salted butter (one stick, cold)

3/4 cups granulated sugar

2 cups unbleached all purpose flour

1  1/2 tsp pure almond extract

selection of  toppings: multicolor nonpareils (grajeas de colores), cinnamon sugar, colored sugar crystals, guava paste or maraschino cherries (halved). Also, you may dredge in super fine sugar (10×10) while still hot to make a sugar coating.

Procedure

1.  Preheat oven 350ºF.

2.  Place almonds in a food processor an pulse until finely grounded.

3.  Add butter, vegetable shortening, sugar, pure almond extract and flour to finely chopped almonds in food processor and pulse until all ingredients are incorporated.  Finish kneading mixture by hand in a bowl.

4.  Measure a scant tablespoon and start making tiny balls with your hands (about the size of cherry tomatoes) and place in baking pan about 1 inch apart (I use a 12×17 inch jelly roll pan).

5.  Once you have finished making the balls,  make a “dent” in the middle of each ball gently (like thumbprint cookies, just that I don’t use my thumb I use my middle finger, but use whatever finger makes you happy.) Use your other hand to hold the dough so that you don’t make too many cracks in the sides while pressing down.

alternate guava paste topping

6.  Fill “dent” with nonpareils or the toping you wish to use.

7.  Bake for 20 minutes at 350º F.  Remove from oven and leave in the pan for about 15 minutes to cool down.  Store in air tight container.

Read Full Post »

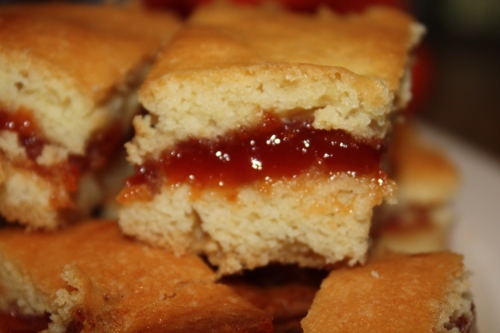
This torte is a traditional dessert in Puerto Rico and Cuba.   In Puerto Rico its called Panetela de Guayaba and in Cuba its called Masareal.  I have tried many homemade as well as commercial versions, but  I have found no comparison to this recipe. I believe the key is the melted butter.  Many recipes ask for softened butter and the turn-out is dryer and more like a cake.  This version melts in your mouth and is more chewey.

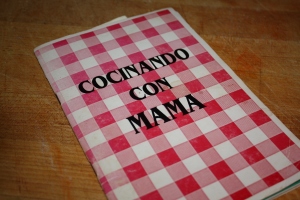
Our Senior year of high school (1991), our mothers prepared a booklet with a collection of recipes called “Cocinando con Mama” or Cooking with Mom, as a graduation present.  It was such a nice surprise to see that most mothers had shared their trademark recipes with us who were at that moment leaving the nest to pursue our college degrees.  This booklet was my companion during my first years in Washington, DC.  From this collection of recipes I make Jeannie’s Fruit Punch and Seven Layer Salad, Carmen Folgueira’s Rice with Onions, Dary’s Mexican Dip, and my mother’s Asopao among others.

A few years ago, we had a get together and my friend Cristina showed up with a basket full of Paneleta de Guayaba squares. They were delicious!  I am sure by now she can make this recipe with her eyes closed and I admit her “guayabitas” always taste better than the ones I make!  When I asked her for the recipe she said it was Bea’s mom (Michelle Rodriguez) recipe in “Cocinando con Mamá”.  So the next day I took out my booklet and got to work in the kitchen. The only variation from the original recipe is that I sift the flour once and add a little vanilla.  As a curious detail, some people like to eat only the corner pieces because they are crustier and others like to eat only the middle pieces which are softer.

It is easy to make and people love to get homemade Panetela de Guayaba as a present, only remember to whisk and beat by hand just until ingredients are fully incorporated.  Also, wet your hands continuously so that the dough doesn’t stick to your fingers.  If you happen to have left overs (rarely happens in my house) or want to make it ahead of time, store in air tight containers or tightly sealed plastic bags.

Enjoy!

Panetela de Guayaba (Guava Torte, Masareal)

Ingredients

2 eggs

1 cup of sugar

1/2 tsp pure vanilla extract

2 cups of self rising flour (sifted)

1 stick of butter (1/4 pound) melted

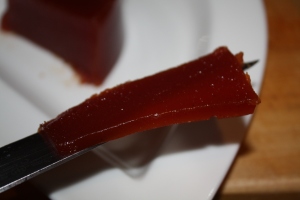
about 10 ounces of guava paste cut into 1/4 inch slices

about 2 tbsp of butter to grease mold

Procedure

1.  Preheat oven 350º F.

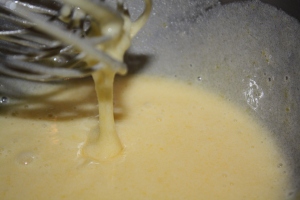
2.  Whisk eggs, vanilla and sugar by hand until creamy in texture.

3.  Add sifted flour to egg/sugar mixture and stir with spatula.

4.  Add melted butter and continue to mix by hand until ingredients are fully incorporated.  You will end up with a sticky dough.

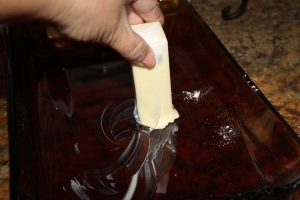
5.  Generously grease a baking mold (I use a glass Pyrex mold approximately 11×8 inches) with butter.

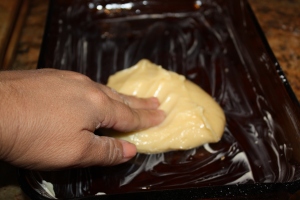
6.  Take a little over half the batter and spread in the bottom of baking mold.  It is very important that you continuously  wet your hands so that the dough does not stick to your fingers. I always place a glass of water in the countertop to dip my fingers and manage the dough.


7.  Place the guava paste strips evenly over the dough.

8.  Cover guava paste with remaining dough and bake for approximately 35 minutes or until toothpick comes out clean.

9.  Let cool and cut into squares.  Serve as a dessert or snack at parties.


Read Full Post »

We inherited flans from many cultural influences.  Back in Roman times people would make savory flans from the surplus of eggs and other ingredients in their “pantry” (spices, spinach, honey, eel, etc.).  Centuries later in Spain and France, sweet flans started to flourish with caramel syrup as well as with other spices and nuts like almonds that the Moors (north africans, muslims and arabs) brought with them to the Iberian peninsula. Now flans are popular desserts in Latin American countries and are known worldwide.  I dare to say that some sort of flan is offered in the dessert menu of almost every restaurant in Puerto Rico!

Note:  The detachable baking dish used for making quiche is called a “flan tin” because in England open pastries filled with savory fillings are also called flans.

This recipe for simple Vanilla Flan is the basis for many variations. There is cheese flan, coconut flan, pumpkin flan, pear flan, guava flan, basil flan, strawberry flan and the list keeps going on and on like Bubba (inside joke for those of you who have seen the movie Forest Gump).  Anyway, it is a simple dessert to make and a crowd pleaser. Of course, flan is always made in bain-marie to successfully make the custard.  FYI, the bain-marie allows the flan to cook evenly in the center without creating a crust on the outside.  I use a 9 inch round metal mold with a hole in the middle, but you may also use an 8- 9 inch round crystal Pyrex or metal mold or double the recipe and make a large rectangular crystal mold.  Serve with mint, berries, ice cream, whipped cream or alone. Sometimes I over beat mixture and the vanilla flan has small holes inside, but it won’t alter the taste just the texture.  The flans I make that include mascarpone or cream cheese are always creamier (like cheesecake) and also delicious (will post recipes in the near future).

About 5 years ago, we rented a house in Casa de Campo, Dominican Republic for a summer vacation.  Our beautiful house had great accommodations, a beautiful view and a great cook.  One day Josefina made vanilla flan for our group and, you know me, always looking to learn new things in the kitchen, saw that she splashed dark rum and lemon zest in the vanilla flan mixture. That detail elevated the flan from good to outstanding giving it a lovely after taste!  She made it almost everyday after that.  We returned back to Puerto Rico rested, relaxed and with about 2-3 more pounds!

Here is my recipe for Vanilla Flan (Flan de Vainilla).  Enjoy!

Vanilla Flan (Flan de Vainilla)

Ingredients

1 1/2 cups granulated sugar

5 eggs

1 14 oz. can condensed milk

1 12 fl. oz can evaporated milk

1/2 cup fresh milk

1 tsp dark rum

1 tsp pure vanilla extract

dash of salt

Procedure

1.  Preheat oven 350º F.

2.  To make caramel put sugar in a sauce pan (I melt it directly in my metal mold in the stove top) and heat (med) until sugar starts to melt and turns light-medium brown in color. About 10 minutes stirring occasionally. Then pour into baking mold immediately making sure the bottom and sides of the mold are covered with some caramel.  Let rest for a few minutes to harden a bit.  Note:  make sure you are not distracted or have children running around in the kitchen while you are making caramel, it is very hot and can cause serious burns on the skin.


3. In a bowl, beat eggs with a whisk or electric mixer with whisk attachment.  Add milks, vanilla, salt and rum and beat until fully incorporated.  (DO NOT OVER BEAT SO THAT  YOU DON’T GET AIR BUBBLES INSIDE THE FLAN). Pass mixture through a strainer.  Add lemon zest and lightly mix with a fork or spoon into mixture.

4.  Pour mixture over caramel in baking mold.  Place mold in lower portion of broiler pan or roast pan and fill with hot water that comes almost half way up the sides of the baking pan to create a bain-marie or “baño de maría”.

5.  Bake for 45-50 minutes. Check for doneness by inserting a knife in the middle. It should come out clean.

6.  Let cool on your counter top a bit before you cover with foil paper and refrigerate for at least 4 hours or overnight.

7.  To serve, take out of refrigerator and let rest for about 15 minutes. With a knife or spatula carefully separate flan from sides of the pan (inside as well if using pan with a hole in the middle). You will notice caramel will come up the sides once it is separated and ready to turn over.

8.  Place serving dish on top of baking pan and turn over quickly.  Scrape remaining caramel with a spatula and pour over flan. Serve chilled.  (If you are going to put it in the refrigerator, cover so that it doesn’t become dry or hard).

Read Full Post »

Older Posts »